First you need a chassis
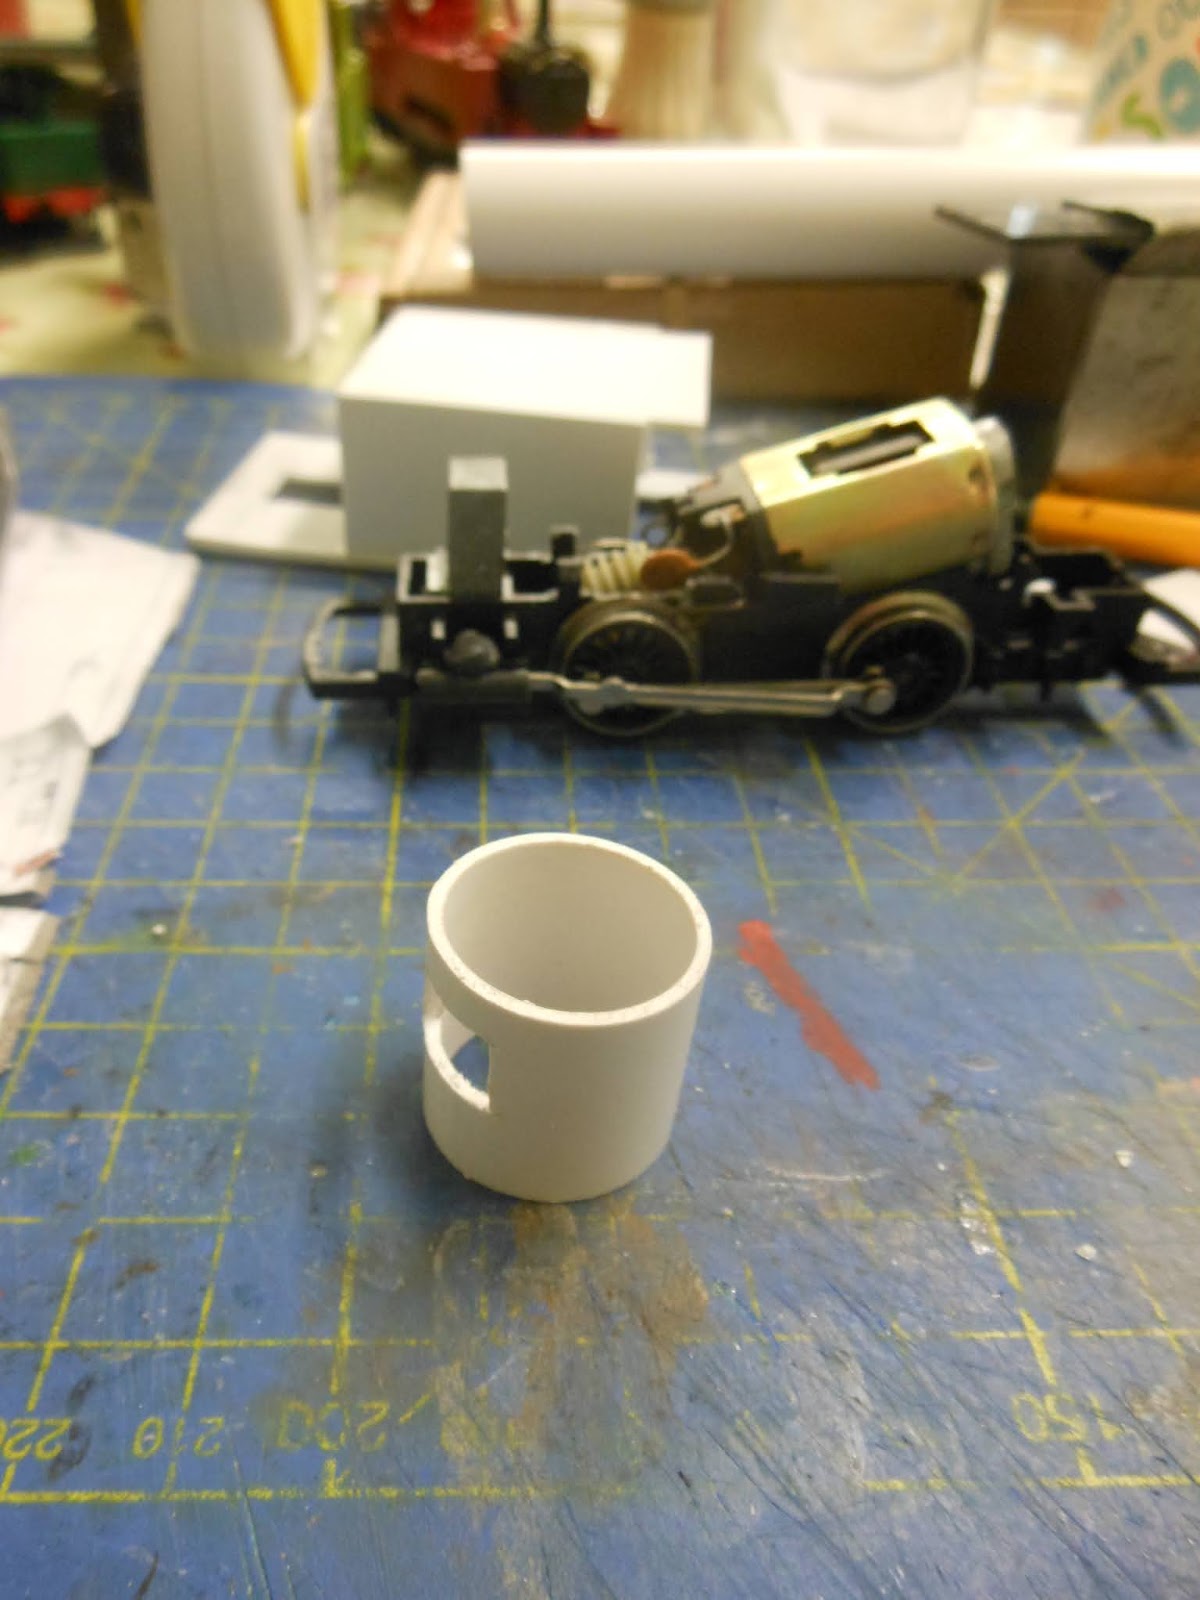
Here is a photo of a Hornby 101 0-4-0 loco chassis. The chassis is not accurate as the wheels are 2' 4" and should be 3' 0" and the wheelbase is wrong. Still it will look right. The running plate is made from 1 mm plasticard with the edges reinforced by some 2 mm x 2 mm angle with rivet detail added. The running plate will be adjusted until the chassis runs free. The boiler will probably made of copper to get the weight. I have ordered some miniature motors to see if I can power the jib.


 The endearing part of this loco, I think, is the low slung boiler. I do not have a working drawing so all is measured from photos. I estimate that the boiler is 3 foot in diameter. This is excellent because my favourite boiler material is 22 mm overflow pipe. You know the stuff it shows if water is overflowing from your toilet cistern. It is about £3 for 2 metres which gives a lot of 0 gauge boilers. Two cuts with a razer saw releases the scale 3 feet's worth of pipe. Now this is where it gets a bit iffy as you have to cut a slot for the weight at the front of the chassis. You could throw the weight away but the crane has to have weight in the counter balance to keep the crane level and then the loco has to be stable when the crane is loaded. You need 1 of those aluminium mitre boxes to cut the pipe, have you got one? No then get one they are cheap and come to the rescue when ever you are cutting small pieces.To cut the slot just cut 2 cuts in the pipe until the saw just breaks through on the inside. Be generous with your dimensions as the body still needs to fit on and off the chassis. Trim out the small piece of waste and dress with a file. Remember the plastic lugs on the chassis locate the body squarely so making some play in this slot will allow the body to fit on and come off without a struggle.
 Now trial fitting, put the body on to the chassis and slip the boiler over the weight. If all went well the boiler should be a smidge lower than the rest of the body, should sit ontop of the plastic lugs and droop down at the front. The droop will be corrected by fixing the boiler to the body but NOT YET. I use a bit of black stuff to hold the boiler to the brace and all is well.

Starting the body work
It is a beautiful morning, I was out of bed at 05:30 and watering the greenhouse. Back at the ubiquitous kitchen table/workspace some 1.5 mm HIP plasticard is cut very accurately. HIP is a better grade of plasticard and is really strong. This part will support the crane so it needs to be strong. Also a few ounces of lead will go inside here. I made the shell in 4 pieces; the 2 sides which are rounded on the leading edge and will be the outside of the side tanks. The top which sits in between the sides and a brace at the front to make everything solid.
Pause for breadth and allow to firm up before doing any more. Test fit to the chassis and it fits great.
 The endearing part of this loco, I think, is the low slung boiler. I do not have a working drawing so all is measured from photos. I estimate that the boiler is 3 foot in diameter. This is excellent because my favourite boiler material is 22 mm overflow pipe. You know the stuff it shows if water is overflowing from your toilet cistern. It is about £3 for 2 metres which gives a lot of 0 gauge boilers. Two cuts with a razer saw releases the scale 3 feet's worth of pipe. Now this is where it gets a bit iffy as you have to cut a slot for the weight at the front of the chassis. You could throw the weight away but the crane has to have weight in the counter balance to keep the crane level and then the loco has to be stable when the crane is loaded. You need 1 of those aluminium mitre boxes to cut the pipe, have you got one? No then get one they are cheap and come to the rescue when ever you are cutting small pieces.To cut the slot just cut 2 cuts in the pipe until the saw just breaks through on the inside. Be generous with your dimensions as the body still needs to fit on and off the chassis. Trim out the small piece of waste and dress with a file. Remember the plastic lugs on the chassis locate the body squarely so making some play in this slot will allow the body to fit on and come off without a struggle.
 Now trial fitting, put the body on to the chassis and slip the boiler over the weight. If all went well the boiler should be a smidge lower than the rest of the body, should sit ontop of the plastic lugs and droop down at the front. The droop will be corrected by fixing the boiler to the body but NOT YET. I use a bit of black stuff to hold the boiler to the brace and all is well.
The next piece will be the smokebox saddle and it will cement the boiler to the running plate. I shall make it with a little clearance so that lugs can be pushed into to disengage the body.
I want to power the crane
 I have spent a few hours worrying about powering the crane on this loco. The motors need to be ultra small because you need 2 motors and the gears have to be really good quality. I ordered 4 x coreless mobile phone vibrator motors and the huge cost of less than a fiver. I am lucky to have a 3D printer so a pair of gears were made and the result was.........................
a little over an inch (28 mm) and means all is OK. The motor, being coreless, does not generate much heat. The no load speed is acceptable on 2 volts so the slewing and chain drums should work well. Silly money really as it will cost about £1.50 per power train.
Think I will spend today designing and test fitting the main slewing mechanism.
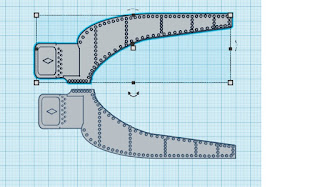
The drawings for the sides of the crane prepared for 3D printing. This took a while to draw so a large cold beer is now due. Here is a picture of the next stage. The 2 sides will take 7.5 hours to print.
 I have just discovered 2 major booboos with the crane locomotive. Firstly the side tanks have rounded ends and secondly the boiler can be seen between the tanks and a plate goes over the boiler to support the crane. So new side tanks have been made and fitted. Making them hollow has provided a void for some lead which I will try tomorrow and see how slowly she will run. A couple of photos shows I am back to roughly where I was yesterday.

As a bit of good luck I have won a couple of Ebays items. Some Kadee No 5 so the locos can be finished off and a Fleischmann 4w diesel shunter which will give up its chassis for a loco. I fancy a Fordson tractor powered shunter or a Sentinal.

 Work is continuing and the boiler is positioned but not fixed yet. Spent some time watch Dubsy on the Foxfield. And things are beginning to look right. Strange arrangement for cab but it will look good in the end.
The drawings for the sides of the crane prepared for 3D printing. This took a while to draw so a large cold beer is now due. Here is a picture of the next stage. The 2 sides will take 7.5 hours to print.

Oooops
 I have just discovered 2 major booboos with the crane locomotive. Firstly the side tanks have rounded ends and secondly the boiler can be seen between the tanks and a plate goes over the boiler to support the crane. So new side tanks have been made and fitted. Making them hollow has provided a void for some lead which I will try tomorrow and see how slowly she will run. A couple of photos shows I am back to roughly where I was yesterday.
As a bit of good luck I have won a couple of Ebays items. Some Kadee No 5 so the locos can be finished off and a Fleischmann 4w diesel shunter which will give up its chassis for a loco. I fancy a Fordson tractor powered shunter or a Sentinal.

 Work is continuing and the boiler is positioned but not fixed yet. Spent some time watch Dubsy on the Foxfield. And things are beginning to look right. Strange arrangement for cab but it will look good in the end.
I have managed a bit of work on 4101 and the following has been fitted: boiler, lower front cab sheet, cab back sheet,


some strengthening underneath and, of course, a temporary chimney. I have decided to call 2544 (the Bagnall-Meyer) Leviathan and the Dubs 4101 will be Goliath a bit of tongue in cheek as she will only lift a ounce or two (2.5 tons in real life). I only realised that the Crane Tank was 4101 and I have used a Hornby GWR 101 chassis.


some strengthening underneath and, of course, a temporary chimney. I have decided to call 2544 (the Bagnall-Meyer) Leviathan and the Dubs 4101 will be Goliath a bit of tongue in cheek as she will only lift a ounce or two (2.5 tons in real life). I only realised that the Crane Tank was 4101 and I have used a Hornby GWR 101 chassis.
I have decided to alter the diabolical valve gear and rods. I will make up new connecting and coupling rods. Fit new cylinders and Joys slide bar and crosshead. I have ordered the brass which has cost about £6 but I think it will make a much better loco.

Started work on the jib. I was going to 3D print the sides but a test print showed it was a poor render. I have made the sides with plasticard and used my ancient riveting tool to add the rivet detail. I am still planning to have the jib powered but it may defeat me. Here of a few photos of the jib shoved in place. I like the overall look of the locomotive and it will be useful in the casting floor of the blast furnace.

 Now I have been thinking about the Smokey Joe chassis. It certainly has its vices not the least being its attempt to emulate a startled rabbit (solveable -electronically). This is the first loco I have built that has a single slide bar arrangement. This morning armed with a sintered diamond file I made the slide bars and started on the crossheads. I will solder up some new rods and make new cylinders with end caps. I may make the cylinders in solid bar as this will add some extra weight although there is already extra lead in the side tanks.
No comments:
Post a Comment